Manage your chatbots
All your bots live on one screen. From there you can see how each one is doing, pause a bot, open it to edit, or create a new one. Here is the quick tour.
Step 1: See all your chatbots
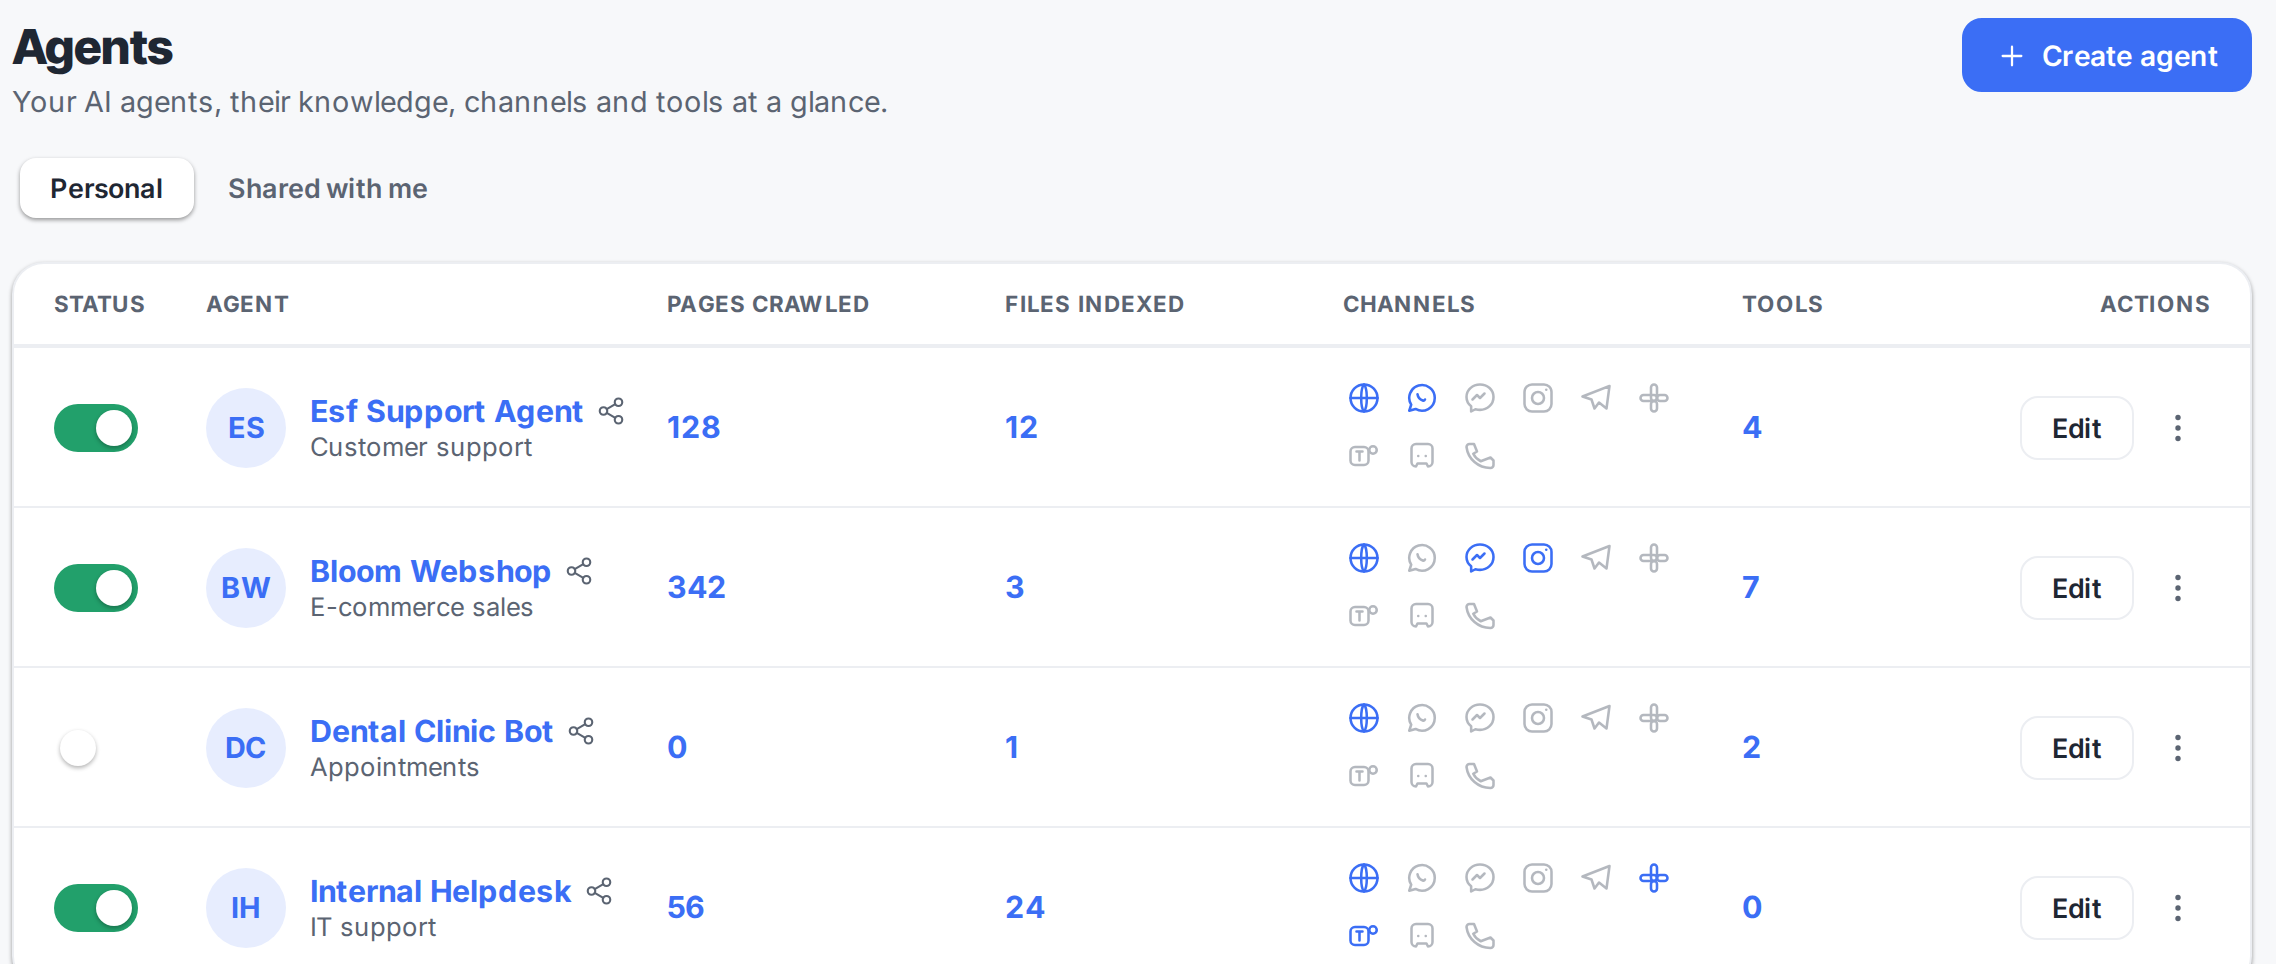
Open Chatbots from the dashboard. Every bot shows its status, how many pages and files it has learned, which channels it runs on, and how many tools it uses.
Step 2: Turn a bot on or off
The switch on the left is the on/off toggle. Green means the bot is live and answering. Grey means it is paused, so it stops replying everywhere without losing any of its setup.

Step 3: Open a bot to edit it
Click Edit on any row to open that bot's settings: its knowledge, appearance, messages and channels.

Step 4: Create a new chatbot
Need another bot, one for sales and one for support? Click Create agent in the top right and follow the short setup.

A focused support bot and a focused sales bot each answer better than one bot trying to do everything. Splitting them also keeps each knowledge base clean.